
She has a pretty awesome and easy tutorial to follow if you click that link above, BUT I made you a tutorial too. They really aren't that different except a couple of things. FIRST, her tutorial is using a kitchenaid stand mixer, which I am poor and do not have, so mine involves a hand mixer with dough hooks. SECOND, her recipe on the tutorial for the garlic cheese breadsticks, is different from mine, I made some adjustments as I don't really love garlic or handling things such as garlic or onions.
Here is what Lauren said you need to know about this pizza dough:
"{1} I use warm water-not hot, not cold. Pleasantly warm. Yeast likes warmth. And I don’t ever use a thermometer because thermometers are annoying for this kind of stuff. Don’t over think this step. If it feels nice and warm like baby bath water, then you’re good. {2} I use honey- I seem to get better results with honey. I don’t know why. You can use sugar if you prefer. {3}Bread flour- you must must must use bread flour. Bread flour means more gluten. More gluten means chewy crust. Chewy crust = good. The end. {4} Knead, knead, knead. Kneading means gluten! And we all know what gluten means. Knead your dough for 6 minutes pretty please. {5}Use a pizza stone if you have one. Put it in your cold oven, and then crank that baby up to the hottest temperature it will go to. For me, it was 500 degrees. That will really give you a crispy bottom, like you get at the restaurants"
So, this is the third time I've made this recipe. I want to tell you that I know for a fact that it is the best. I know this because 1) Taylor loved it, and he is SO particular, and he never likes homemade pizza dough. 2) April and I tried a couple other recipes and none beat this one.
Let's get started, first, here's what you'll need:
[this makes about 1lb of dough. which is enough for two 12-inch pizzas]

1 cup warm water
2 1/4 tsp active dry yeast (You have to use active dry and not fast rising, it makes a difference)
1 tablespoon honey (or sugar, like Lauren I also used honey)
2 teaspoons salt
2 tablespoons olive oil
3 cups bread flour (give or take 1/2 cup depending on head and humidity)
In a large bowl, add the yeast and honey (or sugar) to a cup of warm water. Let it sit for about 5-10 minutes until the yeast starts to bubble and foam so you know it's alive. Pour in the salt and oil then add about half of the flour.
This the part where if you have a stand mixer you can use it to do all of the work. Other wise, pull out your dough hooks for your hand mixer. (Just so you know the first time I made this, I didn't realize that I had dough hooks so I just used the regular egg beaters to initially get the flour incorporated then I hand kneaded it to avoid burning up the motor. It was a pain in the butt, but it worked.)


Then you're done and you can do whatever you want with the dough. You can also keep it in the fridge for a few days until you're ready to use it and I haven't tried to, but I'm sure you can also freeze it.

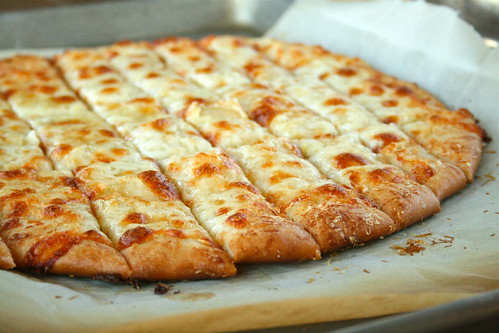
Today, we're going to make what I like to call "Fat Sticks" fat sticks are cheesy bread sticks that they serve at the pizza place (Roy's Pizza, formerly: FAT JACK'S) in my hometown. Sometimes when I'm homesick and reminiscing, I think of them and drool. This recipe is pretty close, and I kind of made it up.
Ingredients
1/2 of the pizza dough you just made
1/4 pound of grated mozzarella cheese (let's be honest, you can be much more generous w/ cheese if you want)
2 tablespoons butter
1 teaspoon oregano
1/4 teaspoon of garlic powder (or more if you like garlic, or you could use minced garlic if you want)
salt and pepper to taste.
Preheat your oven to 400 degrees with your pizza stone in the oven. (If you don't have a pizza stone, you can just flip a cookie sheet upside down.)
Prepare your dough on some parchment paper (makes it easier for transferring to stone or cookie sheet) and flatten it out to about 12 inches (if can be a circle, a square, a heart, a misshapen blob, it doesn't matter.)
*Here's a fun tip, if you're a poor newlywed without a rolling pin, you can just just use a round cup instead. That's what I do, because every time I go to buy a rolling pin the cheap ones are out of stock and then only have the 20 dollar ones.


So, I accidentally bought reduced fat mozzarella (don't do this! gross.) and it did not cook pretty. I refuse to show an unappetizing picture of this. So I'll so what it's supposed to look like instead.
Let me know how you like it!
1 comment:
Those look like the real thing! Do they taste like it?
Post a Comment